Tips and TricksEveryone needs a few.
Tracking QR Codes with Google Analytics
So you want to use QR codes but you’re not sure how to track them in Google Analytics. There are four steps to getting the URLs ready and generating the QR codes that will be ready for tracking using Google Analytics campaign tracking.
Easy enough using the Google URL Builder. This tool adds a string to the end of your website URL which Google Analytics interprets and tracks in the Campaign section of your analytics (Look under traffic sources if you have never used this functionality before)
For the example above this is how you might set up the URL for the postcard.
- Website URL: www.yourdomainname.com/coupon_landing_page
- Campaign Source: QR Code
- Campaign Medium: Postcard
- Campaign Name: Newsletter Sign Up Coupon
After you have filled it out then all that is next is to hit generate and copy that URL. Don’t forget to generate one for each segment you want to track. You may want to start a spreadsheet to keep these all straight for the next step.
Now use your favorite URL Shortener to shorten the link, there are many options. I suggest you take a look at either bit.ly or goo.gl. Both of these services have good analytics of their own and are widely used. Technically URL shortening is optional as you can in theory generate a QR code that for the URL you built in the last step. The reason why you don’t want to do that is because QR codes get bigger based on the number of characters in the URL. In order to make a QR code that can be reasonably worked into the creative of your promotion the shortener URLs are much better.
I have a barcode generator but if you don't have a program to generate the QR code, you might try http://qrcode.kaywa.com. Search the Internet if you would like to use something else, there are several options available.
No you should be able to login to your Google Analytics account and see the results for the QR code scans.
Setting Up Your Mac for Development
A Simple Mac Development Setup
Get Apache, MySQL, PHP and phpMyAdmin working on OSX 10.11 El Capitan
A Super Slick Mac Development Setup
The Perfect Web Development Environment for Your New Mac
Virtual Host Setup Tips
Tutorial for configuring Apache Virtual Hosts on Mac OS X
Need to Change that pesky MySQL Password
How to Change the MySQL root Password in Linux or OSX via Command Line
Did you miss something setting up /˜username Directory
Forbidden 403, You don’t have permission to access /˜username/ on this server
Or this is how I did it
I Develop multiple websites both HTML5 and PHP and don't want to be in the config files everytime. I want to a setup that yeilds quick development prototypes in the ˜/Sites folder and they show up as vhosts magically, no editing any configuration file(s).
Further more, I want my pseudo-toplevel domain .czgrafx to resolve at localhost and any domains/subdomains pathed to the relevant web root folder.
Required to Follow along
(Or this is the base system I used)
- A Mac, with OSX 10.10+ (Yosemite) installed
- A working install of Apache 2.4 (comes preinstalled with OSX Yosemite)
- Homebrew
- A text editor of your choice.
Step 1 – installing PHP
Open the main httpd.conf and turn on PHP
Since we are on a Mac, Apache and PHP are installed by default we just need to activate them.
Open a Terminal window and Type:
sudo nano /private/etc/apache2/httpd.conf
You can hold "control and w" to search and type "libphp5" and enter to find the following line:
## LoadModule php5_module libexec/apache2/libphp5.so
Remove the ## and hold "control and x" type "y" and hit enter. (Obivously the "’s - Quotes are for emphasis)
You have now succesfully edited the httpd.conf file, we can start appache and check some things out.
In the Terminal window type:
sudo apachectl start
and hit enter
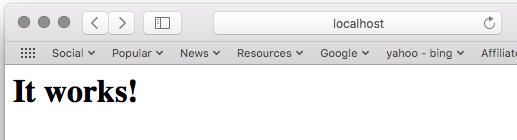
Open a Web browser and type "localhost" hit enter and you should see:
If you were unsuccessful so far, you may need to do some trouble shooting.
Otherwise lets move on to
Enable User Directory and local ip Hosting at ˜/Sites
In a Terminal window Type:
sudo nano /private/etc/apache2/httpd.conf
Like before we need to uncomment some lines. Remember removing ## before each line earlier, we have some more lines now.
Find these lines and uncomment
## LoadModule vhost_alias_module libexec/apache2/mod_vhost_alias.so
## Line 166: LoadModule userdir_module libexec/apache2/mod_userdir.so
## Line 493: Include /private/etc/apache2/extra/httpd-userdir.conf
And I usually uncomment these lines as well
## LoadModule include_module libexec/apache2/mod_include.so
## LoadModule rewrite_module libexec/apache2/mod_rewrite.so
Hold "control and x" type "y" and hit enter. (Obivously the "’s - Quotes are for emphasis)
In a Terminal window type:
sudo nano /private/etc/apache2/extra/httpd-userdir.conf
Find this line and uncomment
## Include /private/etc/apache2/users/*.conf
Hold "control and x" type "y" and hit enter.
Restart the Apache server:
In the Terminal window type:
sudo apachectl restart
And hit enter.
That should have created a Username.conf file at /private/etc/apache2/users/
If you like...
You could test now or ::GOTO 140 (jk)
To test that PHP is now working for the ˜/Sites, add a PHP file in your new user level web root (˜/Sites).
In the Terminal window type:
printf "<?php phpinfo(); ?>" > ˜/Sites/phpinfo.php
You should be able to open a browser and in the address bar type:
localhost/ ˜USERNAME/Sites/phpinfo.php

Looks Good!
140
Now back to the Username.conf file to add some text to.
In the Terminal window type:
cd /private/etc/apache2/users/
And hit enter.
Type:
ls -la
And hit enter.
Permissions for Username.conf should be:
-rw-r--r-- 1 root wheel 136 May 12 22:22 Username.conf
If they aren’t then
Type:
sudo chmod 644 Username.conf
And hit enter.
Now we add some text to Username.conf
In the Terminal window type:
Remeber to replace Username with Your Username
sudo nano /private/etc/apache2/users/Username.conf
And hit enter.
Now a little fancy text to help with Sites and up to 2 Subdomains. This is going to be a lot to type and Remember if you want replace czgrafx with what ever you want for your dev domain.
Type:
User YOURUSERNAME
Group staff
<Directory "/Users/YOURUSERNAME/Sites/">
AllowOverride All
Options Indexes MultiViews FollowSymLinks
Require all granted
</Directory>
<VirtualHost *:80>
ServerName localhost
DocumentRoot "/Users/YOURUSERNAME/Sites"
</VirtualHost>
<VirtualHost *:80>
VirtualDocumentRoot "/Users/YOURUSERNAME/Sites/%1/site/web"
ServerName domain.czgrafx
ServerAlias *.czgrafx
</VirtualHost>
<VirtualHost *:80>
VirtualDocumentRoot "/Users/YOURUSERNAME/Sites/%2/site/web"
ServerName sub.domain.czgrafx
ServerAlias www.*.czgrafx
</VirtualHost>
<VirtualHost *:80>
VirtualDocumentRoot "/Users/YOURUSERNAME/Sites/%2/%1/web"
ServerName sub.domain.czgrafx
ServerAlias *.*.czgrafx
</VirtualHost>
Hold "control and x" type "y" and hit enter.
We need a Sites folder at the User root obviously. If you don‘t have one you can:
In a new Terminal window type:
mkdir ˜/Sites
And hit enter.
Now type:
sudo apachectl -k restart
And hit enter.
Next type:
curl -I http://localhost
And hit enter.
We should see something like:
HTTP/1.1 200 OK
Date: Fri, 17 Jun 2016 04:59:13 GMT
Server: Apache/2.4.18 (Unix) PHP/5.5.34
Last-Modified: Mon, 11 Jun 2007 18:53:14 GMT
Accept-Ranges: bytes
Content-Length: 45
Content-Type: text/html
We have done some work, next step install dnsmasq so our domain names will work when testing and we won‘t need to edit any apache files.
Now to install dnsmasq
I am almost done working this up. Remember if you like I have some links above and I pretty much used adding modifications where I have found issues in the past.
Tricks
Tricks are pretty cool too.